-
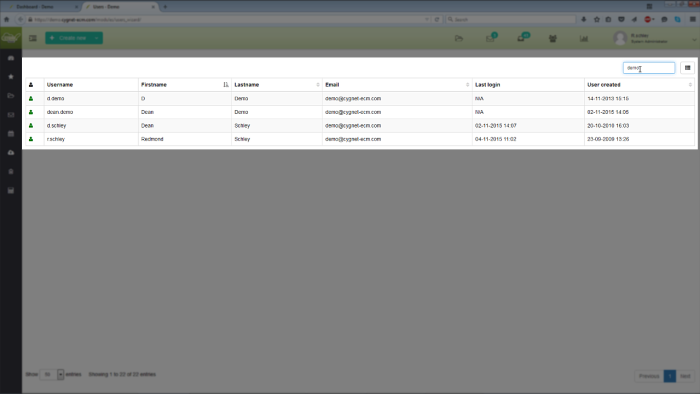
Start off by going to your User Menu, User Toolbox and select User Management. Here we’ll see a listing of all the users available in the system.
-
In the first column you’ll see the user icon. This will either be green, meaning it’s an active user, or red, meaning it’s a disabled user.
-
You can use the columns to sort your users or you can use the filter and type in first or last name as you see here.
-
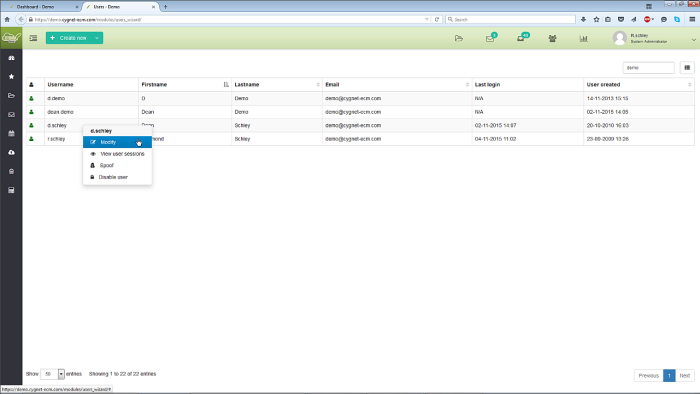
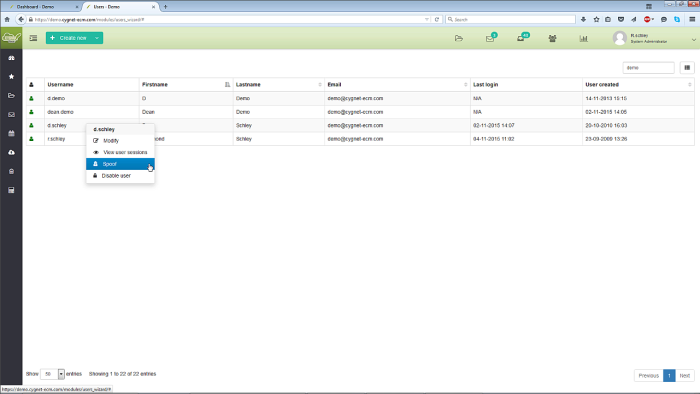
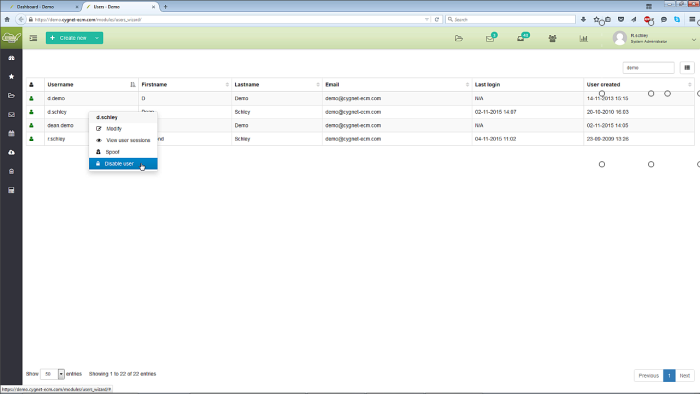
Right-click to bring up the user context menu. Our options are; modify the user, view user sessions, spoof the user or disable user. Let’s start with modify.
-
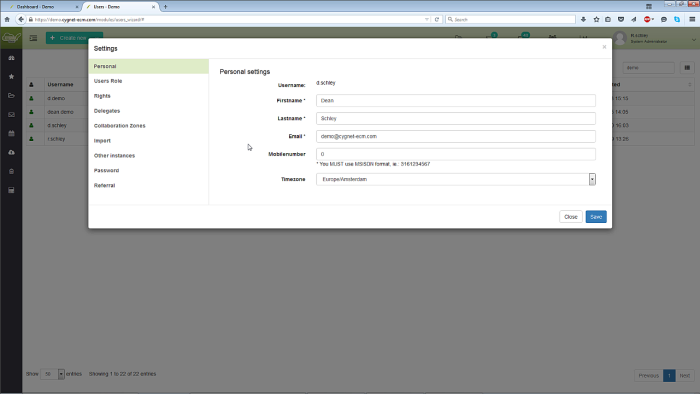
The username is set and unchangeable, all other details of the user are editable. E-mail or mobile number is very important when user has forgotten their password need to be able to retrieve it somehow.
-
Setting the correct time zone is also quite important for the user when using the EMS or Calendar. Making sure all timestamps and meetings are booked correctly.
-
User role shows the users title within the system, with various standard actions that type of user can make.
-
Next we have rights. This will show us what actions the user is permitted within the system. In this viewable file extension field we see here an *. This allows the user to access all file types. You can also use a comma separating value for .doc, .xls, .ppt or any other file extension you’ll use.
-
Delegates allows us to select which other users within the system have access to the users e-mails. setup which personal assistant, maybe colleague, maybe classmate anybody who can see your recorded e-mails you can mention that here.
-
Collaboration zones is used when working on projects with multiple users. We can allow other users access to specific files within a project but limiting their access to the other files and passwords we use
-
You can also import files from simple cloud storage accounts like Dropbox and Google
-
If you have another instance you would like to add from other systems you can do so here. Adding the credentials in will allow for transfer of documents between each other using a transfer protocol and keeping everything encrypted.
-
The last is Password, giving you the option to change it if necessary. Now save any changes made and close this window.
-
-
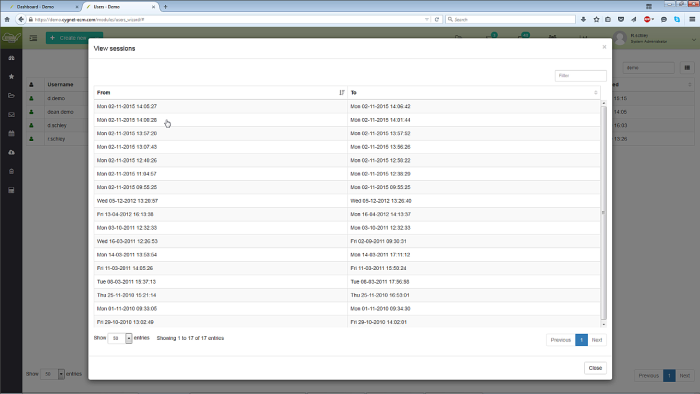
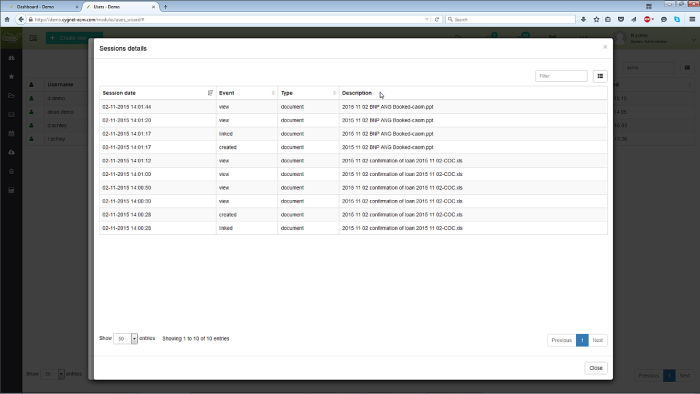
Next in the user context menu is View User Sessions. The user sessions are basically an event log of what the user does when they come log into a system, till they log out.
-
So if we open up a user session, double-click, you will actually see in the first column we have time what was taking place the server dates, then we have the time the session when it took place, what the event was, what type of event and what the description was. This option is available for all of the users sessions
-
-
Next in the user context menu is the spoof option (essentially pretending to be this user). As a system administrator I can spoof users and make sure their role and rights are correctly defined.
-
And the last option is to disable a user. Disabling a user will remove the user from your license but will keep all of the user sessions so you’ll be able to see all the history of that user.